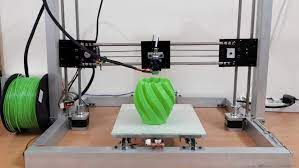
Anycubic Cobra Go provides an educational introduction to 3D printing. With its focus on DIY assembly and accessibility, users are encouraged to stop rushing into printing and gain a deeper understanding of the machine.
Setting up the Anycubic Cobra Go
Looking at the packing list of the Anycubic Cobra Go, there’s a lot to take in. As with most assemblies, it is advisable to make sure that every part is accounted for and that no wires are damaged during transit. While some parts are more easily interchangeable than others, it is better to account for everything rather than risk disruption mid-assembly.
For those already well-versed in laser engraver or 3D printer assembly, the process shouldn’t be too unfamiliar. However, if this is your first time setting up a printer, you’ll want to take your time to absorb each direction.
While the written assembly instructions provide a useful reference point, it is advised to view the Anycubic Support installation video as a cross-reference.
Beyond trying to ensure proper piece fitting, only a few steps have more difficulty. These usually involve a tight position, so there can be some slowdown if you have a large set of hands. Additionally, I wish the wires could have been more accurately labeled for faster installation and less visual double-checking.
Regardless of your skill level, these steps provide an intuitive understanding of Cobra Go’s functionality. When finished, you will calibrate the Cobra Go and make adjustments to your choice of eccentric nuts. These steps are very important; You’ll want to reduce wear and tear on your printer’s wheels.
Anycubic Cobra Go Technical Specifications
If you’re not after the DIY exploration process in 3D printing, the Cobra Go still provides many of the essential features users seek in a 3D printer.
For example, the printer has a smaller footprint of 19.3 x 17.5 x 17.4 inches while offering a build volume of 8.66 x 8.66 x 9.84 inches. Just for ease of use and to keep you printing without bulk, there’s also automatic leveling (25-point Anycubic LeviQ auto-leveling, no less) and a spring steel magnetic build plate. Likewise, you can make belt adjustments via a knob, allowing for easy fine-tuning after set-up.
As a trade-off for some of the more functional elements, the Anycubic Cobra Go comes with a smaller 2.4″ LCD. Likewise, it features a separate Bowden tube for the extruder, which some consider inferior to direct drive extrusions. can (but is not required).
Exploring the Anicubic Cobra Go’s Screen
Compared to the base model Anicubic Cobra, the Cobra Go’s screen measures 2.4 inches compared to 4.3 inches on the standard Cobra. However, it’s not a touchscreen; Instead, the Go exclusively uses knob controls. While the size at the bottom won’t be popular with everyone, it complements the overall compact design.
The control dial is responsive; There isn’t an endless amount of menus to scroll through.
If you need to pause a print and make adjustments to the likes of Z-Offset, it’s an overall smoother process. As for its limitations, they mostly serve as minor inconveniences in exchange for the low price point.
Using Cura for Your Prints
If you’re unfamiliar with Ultimaker Cura, Anycubic does a good job of introducing new users to the software. By following Anycubic’s instructions, you’ll set up a custom machine profile for the Cobra Go. For further ease of use, Anycubic also provides printing parameter files for various filament types to get you started.
As with most preset settings, these are a good baseline to start learning from; They also pay attention to the security aspect of printing. With different models, these can result in less-than-ideal print results, so it’s a good idea to do some benchmark printing to check for areas that need adjustment. For example, models that require support are difficult to remove from Anycubic’s default parameters, so you’ll want to tweak them.
When printing, the Anycubic Cobra Go supports both offline and connected printing. For most users, the option of saving your GCode files to a memory card and inserting them into the printer provides the most fluid experience.
For online printing, you need to install the CH340 driver file from the included microSD card first. From here, you can connect the Cobra Go to your computer via a USB-C cable and choose to print via USB from within Cura. While not ideal, this is an alternative option if you want more operational control of the printer during the print process.

